
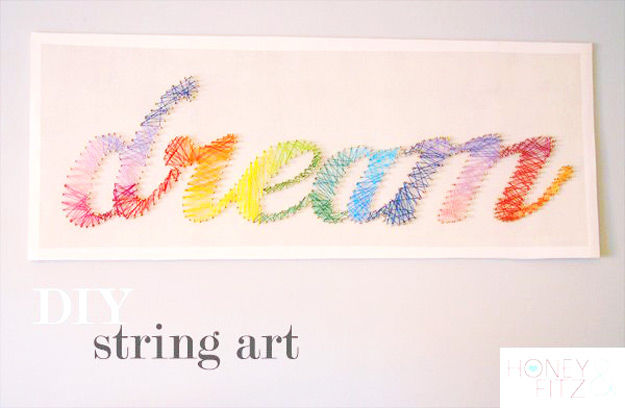
DIY String Art
- leilawight
- Nov 19, 2015
- 2 min read
Supplies:
- 3 2' x4' rolls of cork
- assorted colours of embroided floss
- hot glue gun
- four packets of 11/16" linoleum nails
- two packets of 3M velcro hanging strips
Optional:
- White Paint
- Mini paint roller
- white duck tape
Step 1.
Each piece of cork board is only about 1/32″ thick – definitely not enough to hold a nail stable. So I stacked three together. Use your glue gun to glue them together. Put them back under some heavy books for an hour or so so allow to dry completely.
Step 2.
Find a word that you would like to use and print out in the right size (I chose dream)
Step 3.
Centre your template on the cork board
Step 4.
If you want a white background, paint the cork board with white paint. If you’re fine with the cork color/texture background, then feel free to skip this step. Use a Styrofoam mini roller.
Step 5.
At this point you’ll want to flip the entire canvas over and apply your hanging strips. Do this now so that you don’t have to deal with it once all your nails are in.
Step 6.
Center your template and tape it down.
Step 7.
Insert your nails into the cork, following the outline of your template. They should push in fairly easily with a little pressure (except when you hit a glob of hot glue below…then you’ll need to push a bit!) Trace the inside of the “d”, “e” and “a” by pushing the nails right thru paper.
Step 8.
When you’ve traced the entire template, carefully remove the paper. Work slowly and you’re nails will stay in place.
Step 9.
Starting with dark purple string, Tie it onto a nail at the top of the “d”. Now you’re on your way! Just start weaving in a back and forth fashion. The less you think about this the better. If you don’t like the way a certain section looks, unwind and do it again. It’s very forgiving! I kept moving through the color spectrum as I worked my way through the word. I found that overlapping the colors a bit helped to blend each color into the next.
Step 10.
When your're finished, frame the board with white duck if you want


Comments